12. Advanced terminal use
You asked for it.
12.1. Review
You know all about commands, arguments and programs. You’re aware of how the terminal works and know how it interacts with programs. You’re an expert on the file tree. You can already do most tasks in the terminal, more efficient than ever.
12.1.1. Test questions
- Explain the input/output model to a fellow student or a teacher.
- What’s a background process? How do you create one?
- What happens if you list an inexistent directory?
- How do you bring back previous commands to the command line?
- How do you set the mode of a file? What does mode x stand for?
- How is a command related to a program?
- What’s /dev/null?
12.2. Stdio.h
Many, actually most, of the programs you’ve used produce output. Some of them create their own view (nano, less, top, ...) but many just print it to the console (ls, ps, cat, ...). We’re now focusing on the latter ones. The nice property about those is that they produce some output once, then print it to the console and terminate right after. It’s nice because we can redirect this output into a file. It goes like so:
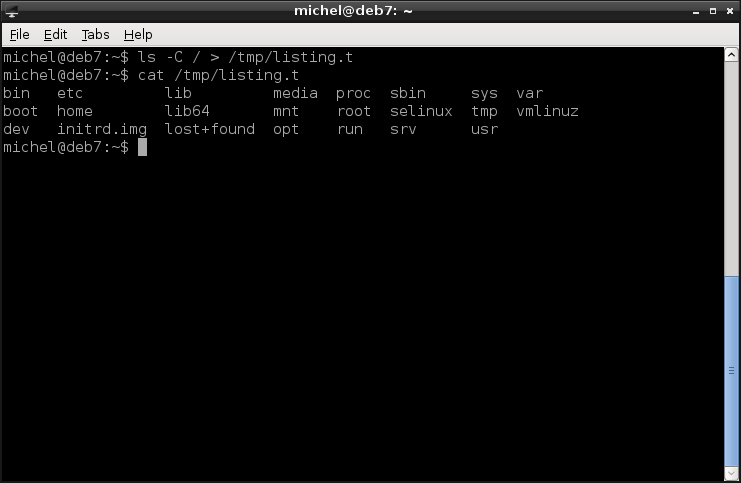
ls -C / > /tmp/listing.t
cat /tmp/listing.t
The ls -C / runs as normal but instead of printing to the console it writes the same thing into /tmp/listing.t. From a programmer perspective, this is practically the same thing. Producing console output is no different from writing a file.
Do you remember the input-output model that was introduced early in this tutorial? In the case of terminal programs, you told it what the input is with the arguments. For example the file you put after cat. The output is what’s printed to the terminal. But the program doesn’t really care from where it gets its input and what happens with the output. That’s the nice thing about this view, given the machine receives the input, it produces its output, no questions asked. The input can be taken from a file (cat) or you enter it youself (passwd) in the terminal. Similarly, you can write output into a file (nano) or to the terminal (cat). From the program’s perspective, the two methods are absolutely identical.
When the program starts, you have to specify from where it should take its input and where its output is written. From the program’s perspective, that’s the standard input and standard output. Normally, both are bound to the terminal instead of a file [1]. But you can redirect it, as you’ve just seen.
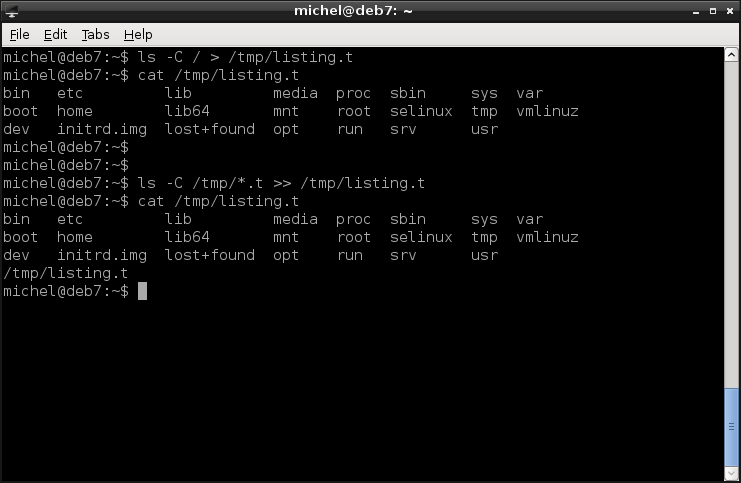
Take care, however, because if the file listing.t already exists it will be overwritten without warning. You can use the following alternative if you want to add the command’s output to the end of the file instead of overwriting what’s there.
ls -C /tmp/*.t >> /tmp/listing.t
cat /tmp/listing.t
The output redirection is very useful if you need the output, let’s say because you want to edit it or send it to someone else. The adding variant is handy if you want the output of several commands.
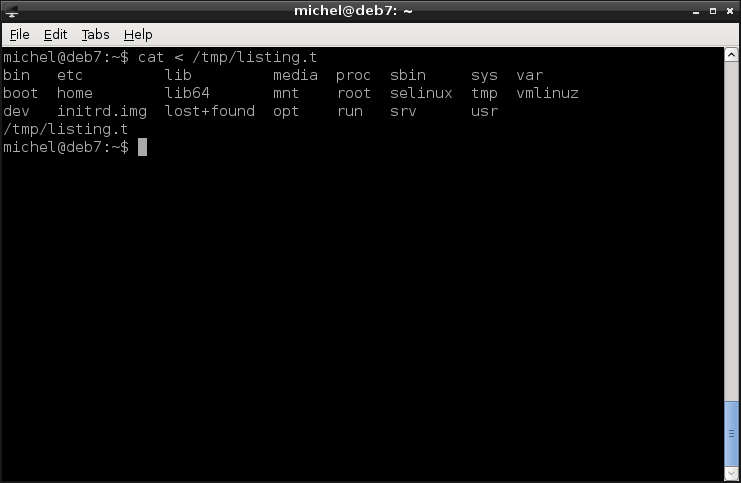
You can do the same thing on the standard input, although it’s used less often. Did you notice how cleverly the greater-than symbol was used so that it looks like an arrow going away from the command? You can guess which symbol you need to redirect the input.
cat < /tmp/listig.t
The example is a bit silly, given that, but it demonstrates how to redirect the input.
Every program can decide on its own how it uses the standard input and output. Remember, it’s just like a file that is always present. So you cannot just use the input redirection on the first file argument (e.g. cp /tmp/target.t < /tmp/source.t wouldn’t work). The behaviour is usually described in the man page of a command.
12.2.1. Exercises
Run cat without arguments. Write some text and press enter. Use Ctrl-c when you’re finished. What do you observe? Discuss with a collegue or a teacher.
cat a file and redirect the output to /dev/null. What happens? How might this useful?
Follow the instructions:
- Create the file /tmp/foobar
- Write some text
- Run cat /tmp/foobar > /tmp/foobar
- Look at /tmp/foobar again.
- What do you observe? Discuss the results with a collegue or a teacher.
12.3. Pipes
Let’s reiterate:
- You can put program output into a file.
- You can get program input from a file.
Doesn’t a thin voice in your head just scream out “Let’s combine those two”? No? Maybe I should get myself tested... So, I’m back, the doctors didn’t find anything (yet). So keep reading the tutorial, it’s officially considered safe by the ministry of truth [2]. Back to work.
So yes, you can combine those two. We call this pipelining. With this, we connect the output of one program to the input of a second program. It’s actually very handy and simpler than it sounds. For example, if you like the less file viewer you could do:
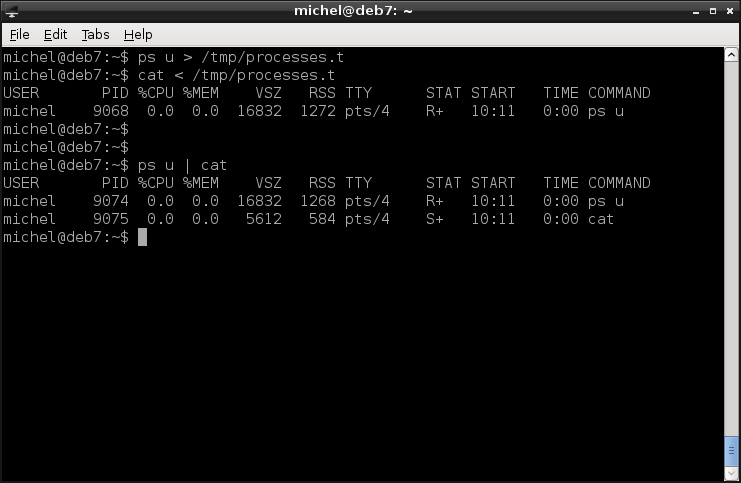
ps u > /tmp/processes.t
less < /tmp/processes.t
However, this would be too anoying and we can do the same but easier with
ps u | less
The pipe (|) character does the trick. The output of ps - which would normally be printed to the console - is now put into less - which would normally display a file. With the pipe you don’t need to actually create a temporary file like in the approach. The data handover goes on the fly. You can even have several pipes after another.
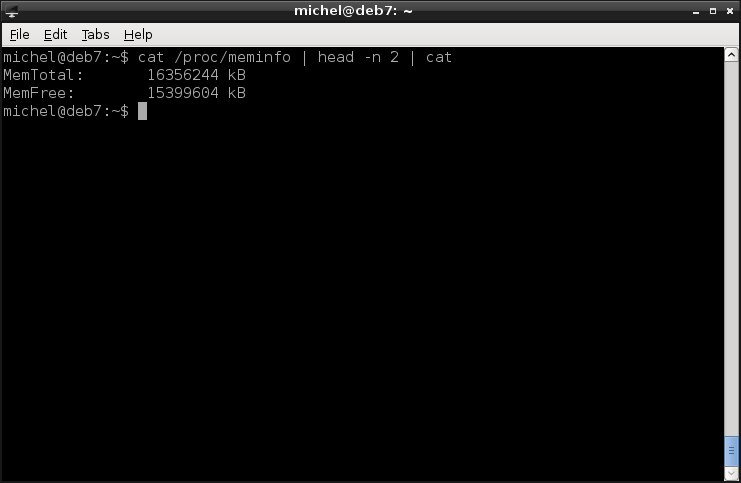
cat /proc/meminfo | head -n 2 | less
The example even makes sense. It shows you the last 10 lines of /proc/meminfo in less. The data gets passed along both pipes. cat reads /proc/meminfo and passes it on. head cuts off everything but the first two lines and again passes the data to less which you know what it does. In short, the command shows you total and free memory - only those two values, nothing more unlike meminfo.
Now, there’s a lot of command line tools you’ve not seen yet but are especially made for text manipulation - really handy in a text based environment. You’ll learn more about those in the next chapter. With these, you’ll use this technique extensively. Let’s just show an example:
ps -ef | grep 'root'
You already know ps and the pipe. grep is a program which searches for text. Here, it prints all lines containing the keyword root. So the command shows you all processes started (and owned) by root.
12.3.1. Exercises
- What does cat | cat do? How often can you pipe cat into cat?
- What’s the purpose of the command tail?
- Run ls /does/not/compute | cat > /dev/null. What do you observe? How can you make the output disappear?
12.4. Does not compute
You’ve learned about a program having a standard output, but in fact it should be plural: standard outputs. Thing is, a program has two seperate outputs, one for normal output and one for errors [3]. Try the following example:
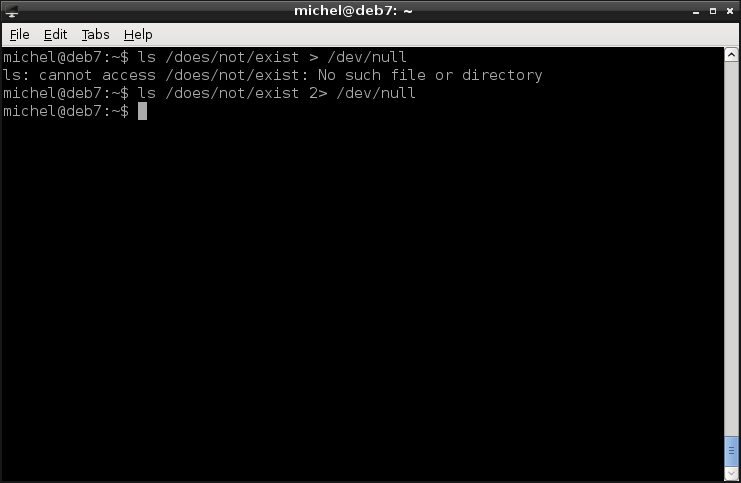
ls /does/not/exist > /dev/null
Huh, you still see the same input as without the redirection? Yes, because you only changed the normal output, not the one for errors. Let’s try a second time.
ls /does/not/exist 2> /dev/null
Et voila, the output is gone. We often use this variant to get rid errors which we don’t care about but clutter the output. You’ve seen the /dev/null special file before - now you’ve learnt what we use it for most often: To send unwanted output to nirvana.
ls /does/not/exist > /dev/null 2> /dev/null
ls /does/not/exist > /dev/null 2>&1
In the last case, you have to write the 2>&1 exactly as state. If you add whitespaces, it will not be understood. For the normal redirection, it doesn’t matter if there’s a whitespace after the greater-than sign. I.e. >/dev/null and > /dev/null do the same.
12.5. More commands
Let’s start with a command you already know.
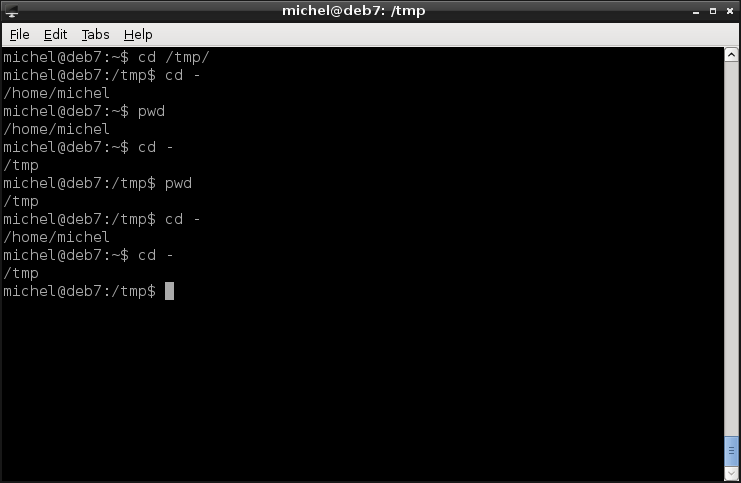
cd /tmp
cd -
pwd
You see what happens? If you give - instead of a file name, you jump back to the path you’ve been before. It’s pretty useful sometimes.
Let’s introduce more commands which don’t really fit the other chapters, don’t provide deep system knowledge but are still essential in your daily work.
First, there’s touch.
touch /tmp/foo
touch /tmp/bar
It’s true to its name and hence sets the access time of a file. However, you’ll mainly use it to create empty files. For example, the command above creates a file at /tmp/foo and /tmp/bar.
So we already have two files, which is nice. Because often you have several files but like to pack them together somehow. That’s what tar does. And even more, it can compress the files. Surely you’ve worked with archives before (e.g. zip), so that’s the tool to create and extract archives. It doesn’t use zip, though, but other compression algorithms (bzip, gzip), more common in the Unix world. Let’s just create an archive containing the two files we have.
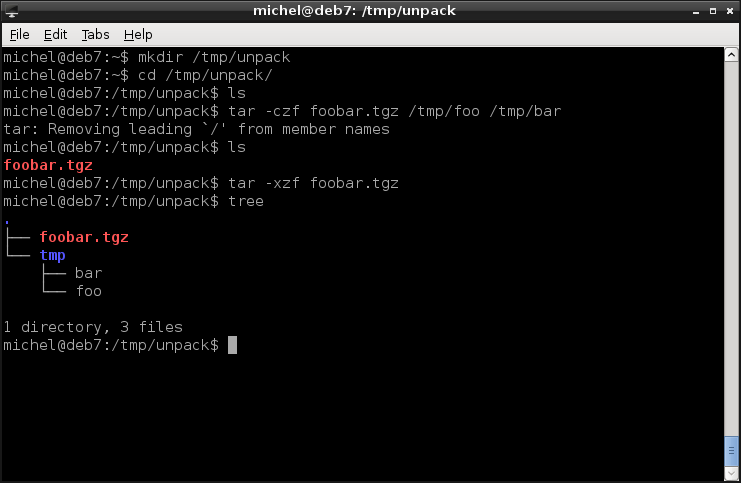
mkdir /tmp/unpack
cd /tmp/unpack
tar -czf foobar.tgz /tmp/foo /tmp/bar
tar -xzf foobar.tgz
ls
The first tar creates the archive foobar.tgz and fills it with /tmp/foo and /tmp/bar. The second tar unpacks the files from foobar.tgz and puts them in the current directory (/tmp/unpack). You control if you create or extract an archive with the -c or -x arguments. The -z argument makes tar use the gzip compression. Which isn’t really necessary since our two files are empty but you’ll meet this compression method often, so it’s good to know. The alternative bzip algorithm would require the -j option instead. The -f you always specify unless you want tar to read the archive contents from the standard input. Right after comes the archive file - which is either the source when extracting or the target when creating. Yeah, annoying but just go with it or write your own tar [4].
And now something completely different. By now you hopefully know the command history and that you can pass through it with the Up/Down cursor keys. Here’s a command which lists the whole history at once.
history
Very handy if you want to check your recent work. The next command should not be executed carelessly. It shuts down the machine and turns the power off.
sudo halt
Of course you can also restart the machine instead of shutting it down.
sudo reboot
OK, that was our little tour of commands.
12.5.1. Exercises
- What’s the oldest command in your history?
- How many times would you have to press the Up cursor key to reach the oldest command?
- Can you put directories in a tar archive?
- What’s the intended purpose of cat?
- Tar the files /tmp/foo and /tmp/bar using bzip compression.
- Tar the files /tmp/foo and /tmp/bar using no compression.
- Why do you need root privileges for reboot or halt?
12.6. Scripting
Sometimes you find yourself in the situation where you have to do the same things over and over again. Maybe there’s a specific sequence of commands and you can’t or don’t want to remember it. Perhaps you want to write down some commands because they’re important but you use them rarely and they thend to vanish from the history. These are just a few scenarios outlining why we love scripts. Scripts are almost plain text files. But the text they contain is actually a command. One per line. Simple as that.
#!/bin/bash

cd /tmp
tar -xzf memory_history.tgz 2>/dev/null
date >> memory_history.t
head -n2 /proc/meminfo | tail -n1 >> memory_history.t
tar -czf memory_history.tgz memory_history.t
rm memory_history.t
echo "Hello world from a very cool script"
The first line tells the computer that this file is no ordinary text file but a shell script. The #! sequence is known as hash-bang. It’s the first of every script and you just copy it as written here. When you run the script, all of the commands are executed. The sequence above writes the current date and free memory to a file, then compresses the file. The last line just print some static text.
Maybe you want to run this periodically or before every shutdown or whenever. It would be too anying to type the six commands every time and with a script you just run the script and all the commands inside are executed automatically.
You can also put plain text there, starting with the hash sign (#). Any such line will not be executed. You use this for annotations so you can make comments about the commands you run. You’ll be really glad to have them if you read the script after half a year. Let’s exercise this.
#!/bin/bash

# Change to the target directory.
# Maybe you'd want to move it from /tmp if you need the stats over a reboot.
cd /tmp

# Unpack the last archive
# We'd get an error if we run the script for the first time, so we redirect it to /dev/null
tar -xzf memory_history.tgz 2>/dev/null

# Get the information and write it to the target file
date >> memory_history.t
head -n2 /proc/meminfo | tail -n1 >> memory_history.t

# Compress again and remote the temporary file
tar -czf memory_history.tgz memory_history.t
rm memory_history.t

# Let's print some text to show that everything went well
echo "Hello world from a very cool script"
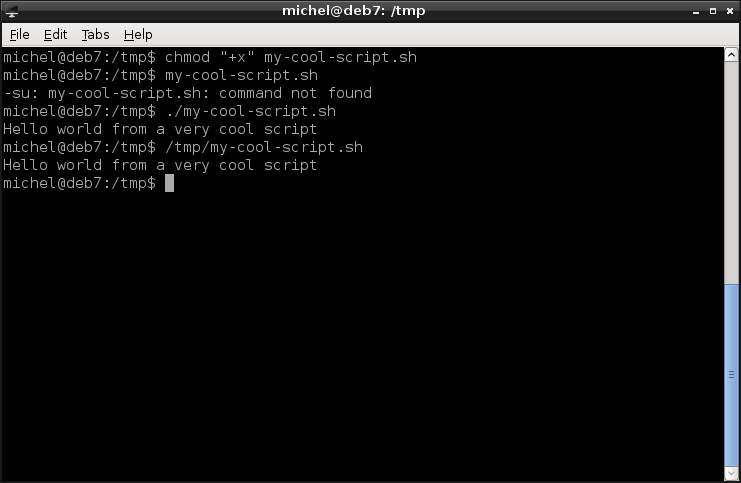
Type or copy the above script, including the comments, into a file my-cool-script.sh. So you now have a small script. You can sure execute it but might be confused if you don’t know how: You’ll probably get an error. That’s because you have to tell bash not to look in the normal program folders but to run the command in the current directory. You can state an absolute or relative path, as you like. Oh, and make sure you’ve set the execution permission.
chmod "+x" my-cool-script.sh
./my-cool-script.sh
And just so, without even realizing, you’ve make your first step towards programming.
12.6.1. Exercises
- Consider the command bash my-cool-script.sh. Why does this work without the ./?
12.7. More keys
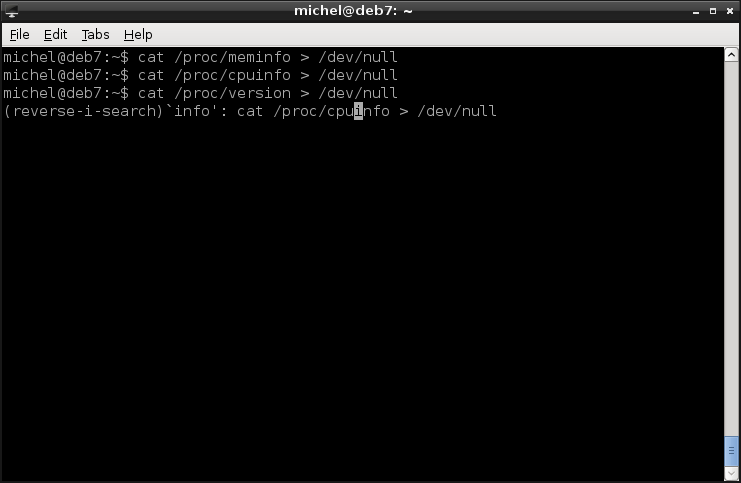
We still haven’t exhausted the key combinations you have on the terminal. You’ve done quite some work now on the command line and probably your command history is rather large. Going back to a command you’ve used a couple of days or even months ago would take more time than retyping. So, of course there’s a shortcut. Let’s get an example set up. Run the following three commands, but we don’t actually care about the output (and you’ve seen it plenty of times).
cat /proc/meminfo > /dev/null
cat /proc/cpuinfo > /dev/null
cat /proc/version > /dev/null
Now let’s quckly execute the second one again. Type Ctrl-r. Then type info. You already see the original command on the prompt. Press Enter to execute it. Nice! How about the first command? Do the same again: Press Ctrl-r, then enter info. You’ll now see the second command, so again press Ctrl-r and the first command appears plain as day.
With this method you can quickly search through your command history. The letters you enter is your search keyword. All command lines containing this keyword (anywhere) are considered. By pressing Ctrl-r repeatedly you can go through the search results. In short, the reverse search works as follows:
Press Ctrl-r to start the reverse search
Enter some search keyword.
Press Ctrl-r to go through the search results.
- Press Enter to execute the command like you see it.
- Press Tab, ESC or the left/right cursor keys to get the command on the prompt, so you can edit it.
- Press Ctrl-c to cancel and get a new, empty prompt.
12.8. MORE Keys !!!
Alright, how about this one. Instead of typing exit, you can be much faster. Simpy type Ctrl-d instead. And it even works with many programs, no matter if they use exit or quit or whatever to terminate. Ctrl-d works just as well.
What this key actually does is it sends an EOF (End-Of-File) to the running program. If a program reads its input from a file, at some point the file has ended. The program is told so by reading EOF as the very last character. Recall that to the program it’s the same if the standard input is a file or the terminal. So you tell the program that the ‘file’ it reads has now finished. Most programs react to this by terminating.
Let’s see this in action. As in an earlier exercise in this chapter, run cat without arguments.
cat
Now, let’s not terminate with Ctrl-c, which would abort the program. Instead, press Ctrl-d. Then, cat thinks that the input file (you know how to specify this, don’t you) has ended and terminates - just as it does when you run it on a file. Be careful, though! Pressing Ctrl-d also closes the terminal. So if you do it too often, you might close it by mistake (or log out if you’re on the TTY).
12.9. MOAR KEYS !!!1!!elf!!!
OK, OK, I’ll show you another. But that’s the last one! Here you go: Mark some text in the terminal with the mouse. Yes, that’s right you have to use the mouse for this one. So select some text just like you’d copy it. Then press the middle mouse button. Yes, there is a middle mouse button, but it depends on the model. Some have three buttons or a clickable mouse wheel. If your mouse doesn’t, try clicking both buttons at the same time (takes some practice, though).
In case that it worked, you see the effect yourself. Otherwise, what should have happened is that the selected text is inserted in the command line. Agreed, it’s not actually a key combination, but still comes in handy. By the way, this trick isn’t restricted to the terminal. You can insert selected text like this in any program without the well known copy/paste key combination.
So, I hope you’re ashamed of yourself because you touched that filthy, filthy mouse.
12.9.1. Exercises
- Wash your hands after having touchted that filthy, filthy mouse.
- Can you close nano with Ctrl-d? Why (not)?
- Can you close man ls with Ctrl-d? Why (not)?
- Bring the first command from your history back on the command line. If you’re simple enough to press the Up key so many times, you don’t deserve the reverse search anyhow.
- Type something, then invoke the reverse search. Is there a way to bring back what you typed at first?
- Invoke the reverse search, then type ‘infa’. From here, can you still get to /proc/meminfo without restarting the reverse search?
12.10. Summary
You’re terminal skills are unquestioned. You’ve increased your knowledge about how computers and programs function once more. You know how to deal with output just as well as files. You can combine commands at ease. You make errors disappear waving your hand slightly. You hardly need the mouse anymore [5]. But if you do, you’re quicker than ever.
12.10.1. Exercises
- Consider the line /path/to/somefile > cat. What would that do? Don’t actually run it!
- Describe in your own words for what the end-of-file is used.
- Research in the internet how the end-of-file is represented.
- Give two reasons why you prefer the keyboard over the mouse.
- Explain how input/output redirection works to a fellow student or a teacher.
- Explain the pipe in the context of the input/output model with a collegue or a teacher.
12.11. Cheatsheet
- head [OPTIONS] [-n COUNT] [FILE]
- cd -
- touch
- tar [-x] [-z] [-f SOURCE]
- tar [-c] [-z] [-f TARGET] SOURCE
- history
- halt
- reboot
| [1] | Consider ls. There you neither read from the file nor the terminal. The program still gets the terminal as standard input, it just doesn’t make use of it. |
| [2] | This largely depends on the dose. The LD50 value is  . . |
| [3] | Of course, a program can write to as many outputs as it pleases. But those two are always guaranteed. If there’s need to have more outputs, usually files or other means are preferred over the terminal (where you cannot seperate the different outputs anymore). |
| [4] | Since you live in a world with free and open source software, you can easily do this. There are easier alternatives, however. For example you could write a small script which does some argument rewriting for you, then call the original tar. Or define an alias. Or cat the file and pipe it into tar. You see, there’s many options. |
| [5] | The filthy, filthy mouse. Also filthy hobbitses. |